Accessing QuPath 0.6.0 on the HPC Cluster
This guide will walk you through how to use QuPath 0.6.0 on the Crick’s HPC cluster. If you need help at any step, see support section.
This version of QuPath requires some libraries that are not compatible with NEMO’s. To solve this, QuPath runs in a “container” – a self-contained environment that has everything it needs. So rather than installing it ourselves, it is available in the apps folder in NEMO. These instructions will guide you on how to access it.
What is QuPath 0.6.0?
QuPath is a popular, open-source tool for digital pathology and whole slide imaging analysis. The new version (0.6.0) brings several new features and improvements. To learn more about what’s new, see: QuPath v0.6.0 release notes & features
Step 1: Start a Desktop Session
- Log in to the HPC cluster via Open OnDemand.
- Start a Nemo desktop session with the resources you need (CPU/GPU, memory…).
Step 2: Open a Terminal
- Once your desktop session starts, open a terminal window.
Step 3: Load the Singularity Module
Every time you open a new terminal, you must laod the Singularity module – the container platform. Type the following and press Enter:
ml Singularity/3.11.3
Step 4: Run QuPath
Replace path/to/your/data with the folder where your data/project/images are stored.
a) If you are using a GPU node:
singularity run --nv -B /path/to/your/data:/data /camp/apps/containers/QuPath/0.6.0/qupath_0.6.0.sif
b) If you are NOT using a GPU node:
singularity run -B /path/to/your/data:/data /camp/apps/containers/QuPath/0.6.0/qupath_0.6.0.sif
Important:
- You must replace
/path/to/your/datawith the actual path to your data on the cluster (for example,/camp/lab/labname/yourusername). - Your data will be accessible inside QuPath at the
/datafolder.
Step 5: First-Time Setup – Select Your User Directory
The first time you open QuPath, you will be asked to select a User Directory.
- Please create a new folder (e.g.,
qupath_v6) inside your lab-space directory (not your home folder!). -
- Example:
/camp/lab/labname/yourusername/qupath_v6
- Example:
- Select this folder as your User Directory.
- Why? The home folder has limited space and can fill up quickly! Extensions and plugins are installed here, so choose a location with enough storage.
Accessing your data in QuPath
When you open a project/image or are selecting your user directory, a file browser window will appear. Important: this window opens in “Home” by default, so your home directory, but this is NOT where your data is located.
Follow these steps to navigate to your data:
- In the file browser, click on “Other locations” (on the left sidebar)
- Select “Computer” to access the root file system.
-
Navigate to the “data” folder.
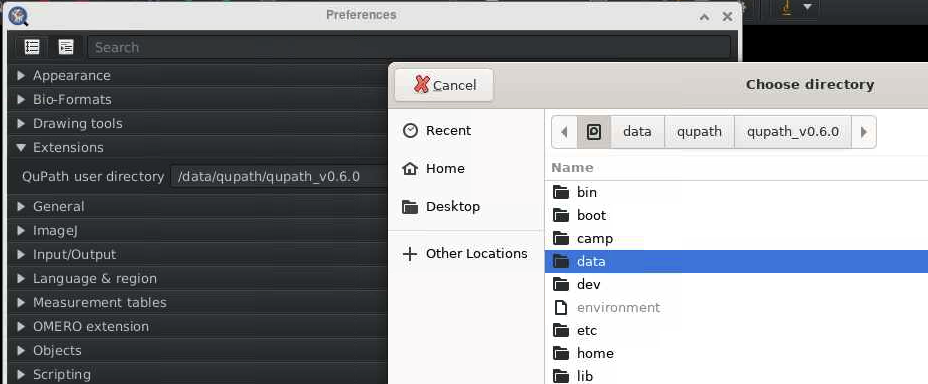
- You will now see the path you specified when launching QuPath in the terminal (step 4). For example,
/camp/lab/labname/yourusername. From here, you can navigate to your project files.
Note: once you navigate into the /data folder, you won’t be able to navigate backwards to other system locations, so make sure the /path/to/your/data includes all the folders you need to access in your QuPath project.
Need Help? Contact Us!
If you have any questions or run into any issues, we’re here to help. Reach out to the Image Analysis team in CALM:
- Email: bioimage-analysis@crick.ac.uk
- Slack: #image-analysis
Happy analysing!