This guide will walk you through how to use QuPath 0.7.0 on the Crick’s HPC cluster. If you need help at any step, see the support section.
This version of QuPath requires some libraries that are not compatible with NEMO’s. To solve this, QuPath runs in a “container” – a self-contained environment that has everything it needs. So rather than installing it ourselves, it is available in the apps folder in NEMO. These instructions will guide you on how to access it.
Looking for an older version? Earlier guides are available for QuPath 0.6 and QuPath 0.5.1.
What is QuPath 0.7.0?
QuPath is a popular, open-source tool for digital pathology and whole slide imaging analysis. The new version (0.7.0) brings several new features and improvements. To learn more about what’s new, see: QuPath v0.7.0 release notes & features
Instructions to Access QuPath v0.7 with OnDemand
Step 1: Start a Desktop Session
- Log in to the HPC cluster via Open OnDemand.
- Start a Nemo desktop session. For more information, see the HPC Wiki.
Step 2: Open a Terminal
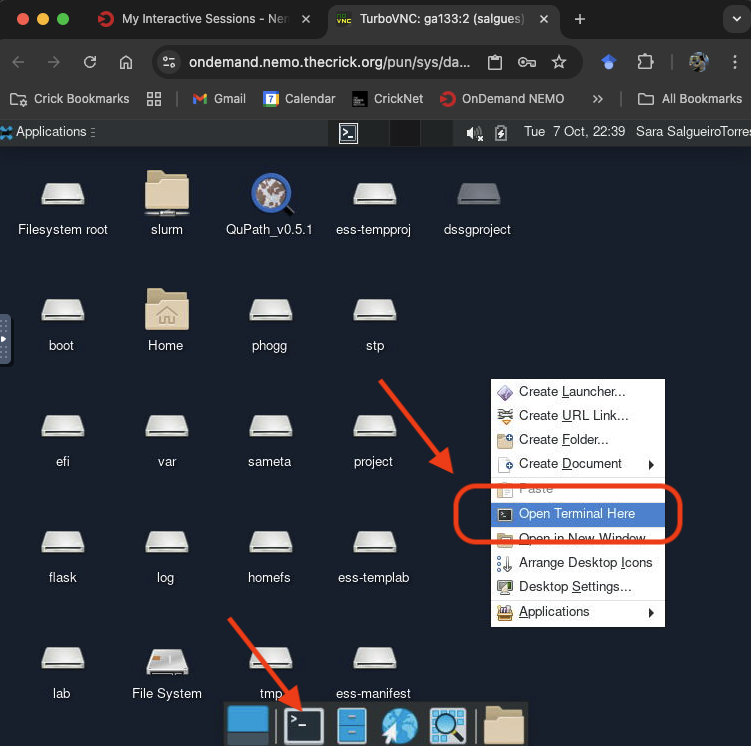
- Once your desktop session starts, open a terminal window.
Step 3: Load the Singularity Module
Every time you open a new terminal, you must laod the Singularity module – the container platform. Type the following and press Enter:
ml Singularity/3.11.3
Step 4: Run QuPath
Replace path/to/your/data with the folder where your data, project, and images are stored.
a) If you are using a GPU node:
singularity run --nv -B /path/to/your/data:/data /camp/apps/containers/QuPath/0.7.0/qupath_0.7.0.sif
b) If you are NOT using a GPU node:
singularity run -B /path/to/your/data:/data /camp/apps/containers/QuPath/0.7.0/qupath_0.7.0.sif
Important:
- You must replace
/path/to/your/datawith the actual path to your data on the cluster (for example,/camp/lab/labname). - Your data will be accessible inside QuPath at the
/datafolder.
Shortcut: add the QuPath icon onto your NEMO Desktop
Instead of entering terminal commands every time you launch QuPath via OnDemand, you can create a one-time desktop launcher shortcut.
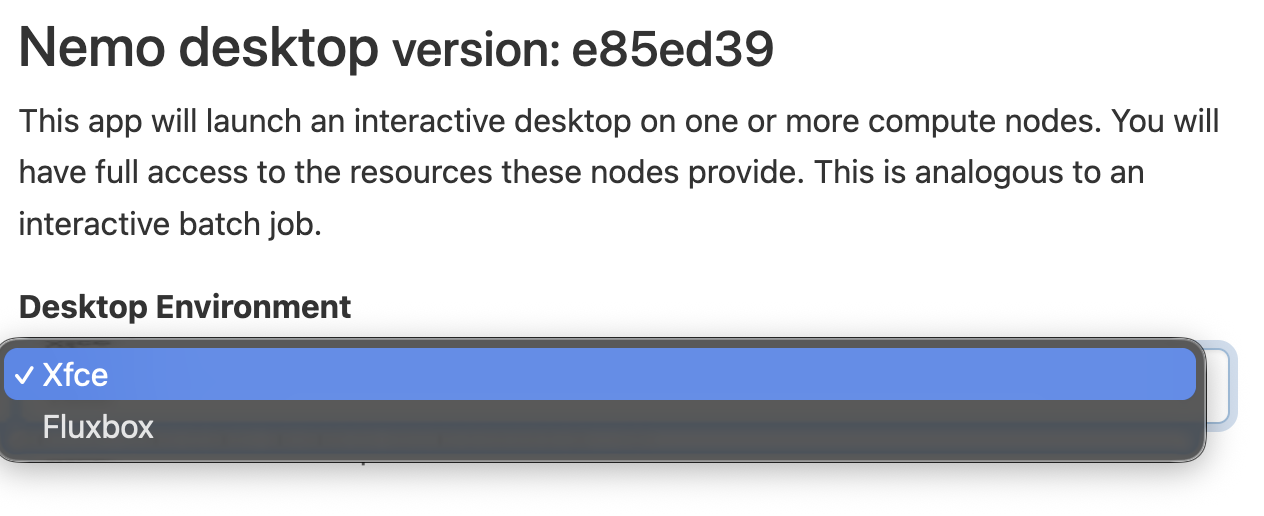
Step 1: Start an Xfce session
Ensure “Xfce” is selected when requesting a session in OnDemand.
Step 2: Open the Terminal
Once your desktop session starts, open a Terminal window, either by right-clicking and selecting “Open Terminal Here” or by clicking on the relevant icon in the bottom menu bar.
Step 3: Create the launch script
Open the nano text editor to create a script named run_qupath_v07.sh in your home directory:
nano ~/run_qupath_v07.sh
Step 4: Add the execution commands
The nano text editor will open a blank text file. Paste the commands required to launch the container (from Step 4 in the instructions above).
ml Singularity/3.11.3
singularity run --nv -B /path/to/your/data:/data /camp/apps/containers/QuPath/0.7.0/qupath_0.7.0.sif
⚠️: Replace
path/to/your/datawith your lab’s working directory on NEMO (e.g.,nemo/lab/labname/yourusername. You will only be able to access files inside the directory you bind here.
Step 5: Save and exit
- Press
^X(orCtrl + X) to exit. - Type
Yto confirm saving changes. - Press
Enterto keep the default filename.
Step 6: Make the script executable and test
Grant execute permissions to the script:
chmod +x ~/run_qupath_v07.sh
Verify that the file exists and is executable (it should appear in green):
ls -l ~/run_qupath_v07.sh
And then check it launches QuPath successfully:
~/run_qupath_v07.sh
Step 7: Create the desktop launcher
Right click anywhere in your Desktop, and select “Create Launcher”.
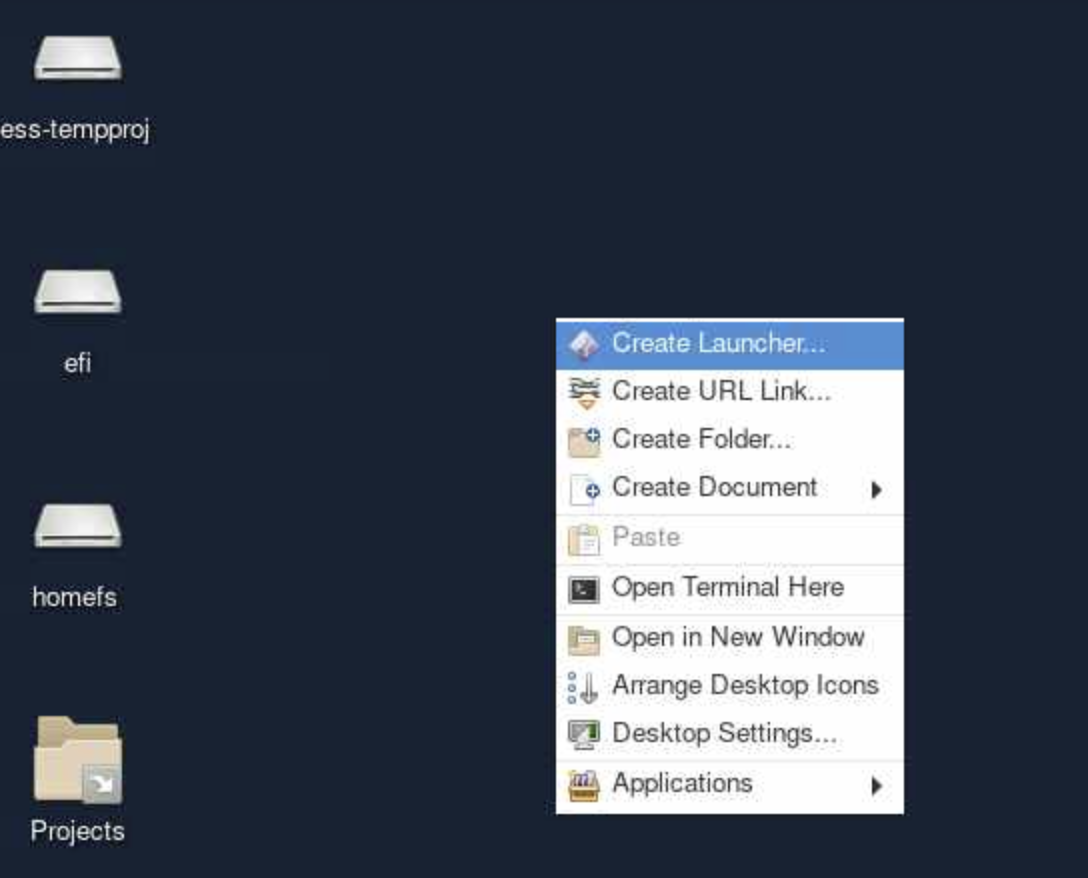
Fill out the following fields:
- Name: “QuPath v0.7”
- Command: click the file browser icon and select the folder where
run_qupath_v07.shlives. - Icon (optional): download the QuPath logo here, save it in your NEMO storage, and select it via the icon selector.
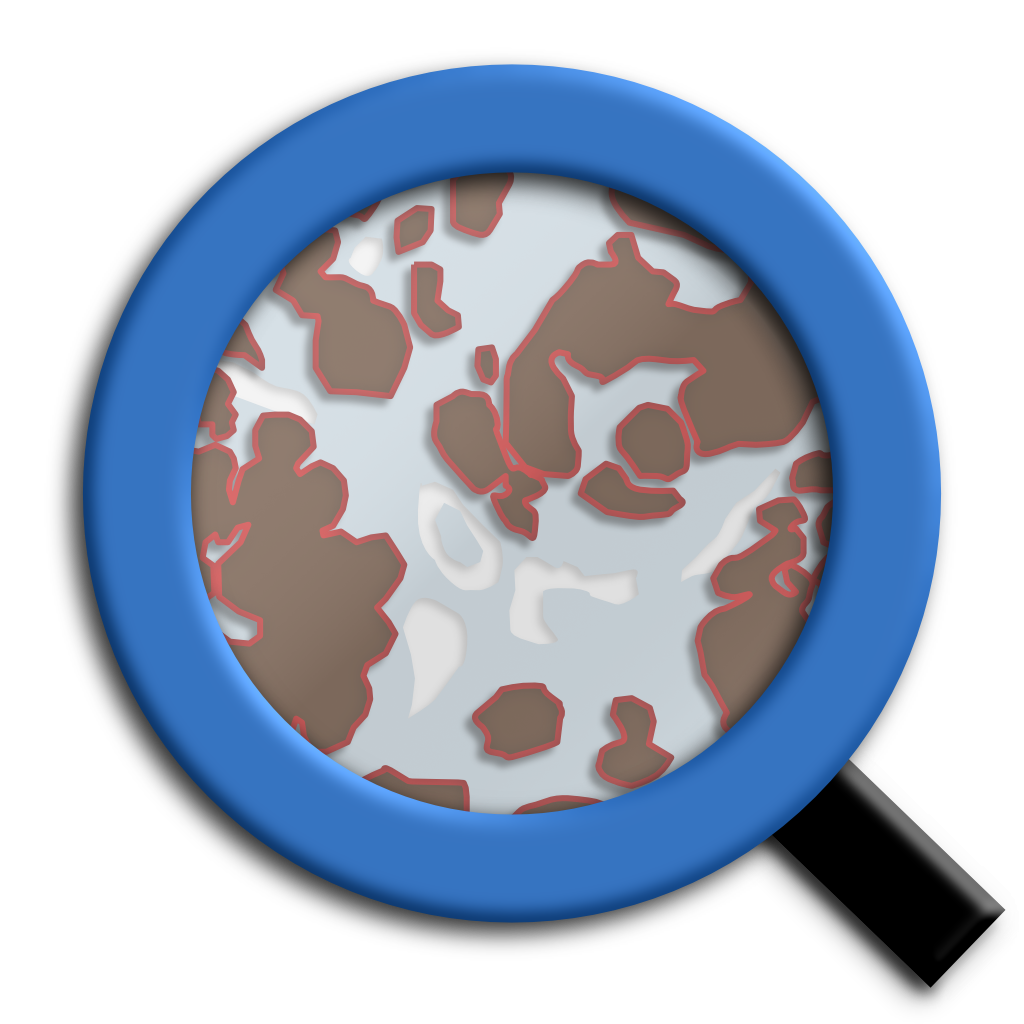
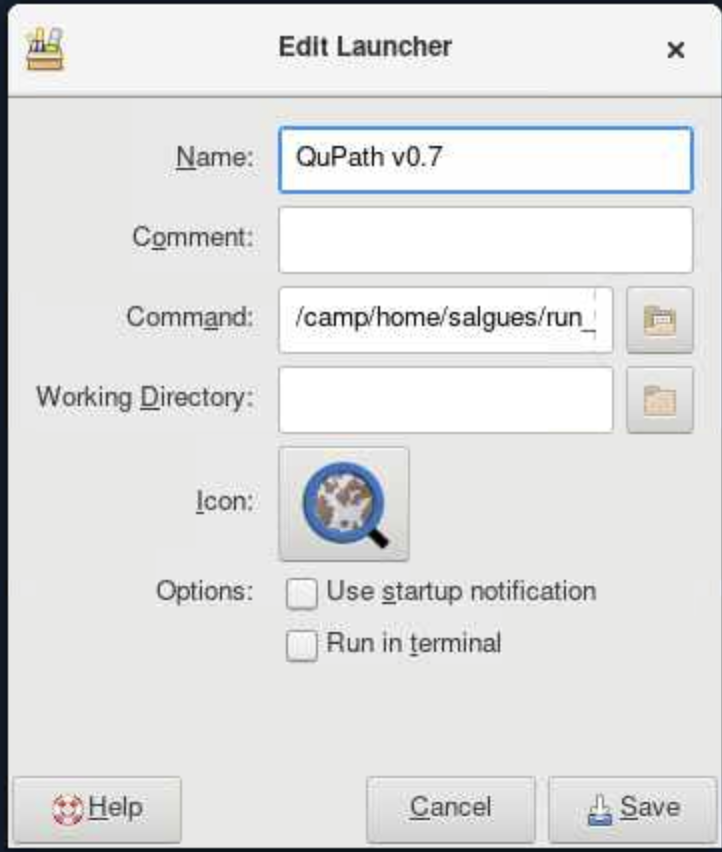
🎉 Double-click your new desktop icon anytime to launch QuPath directly! 🎉
How to Set Up Your User Directory
First time only!
The first time you open QuPath, you will be asked to select a User Directory.
- Please create a new folder (e.g.,
qupath_v7) inside your lab-space directory (not your home folder!). -
- Example:
/camp/lab/labname/yourusername/qupath_v7
- Example:
- Select this folder as your User Directory. Why? The home folder has limited space and can fill up quickly! Extensions and plugins are installed here, so choose a location with enough storage.
Accessing OMERO from QuPath
OMERO is an image server available at the Crick to store and manage microscopy images. It is the recommended location for storing image data, and QuPath can access OMERO images directly via an extension.
To install the OMERO extension: Follow the installation instructions in the Crick OMERO Guide.
Once installed, you’ll be able to browse and open your images directly from OMERO within QuPath, without needing to copy them locally.
Accessing your data in QuPath
When you open a project/image or are selecting your user directory, a file browser window will appear. Important: this window opens in “Home” by default, so your home directory, but this is NOT where your data is located.
Follow these steps to navigate to your data:
- In the file browser, click on “Other locations” (on the left sidebar)
- Select “Computer” to access the root file system.
-
Navigate to the “data” folder.
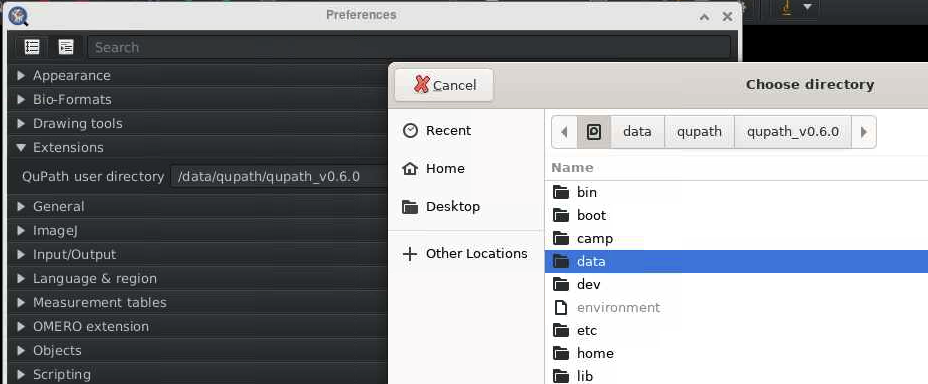
- You will now see the path you specified when launching QuPath in the terminal (step 4). For example,
/camp/lab/labname. From here, you can navigate to your project files.
Note: once you navigate into the /data folder, you won’t be able to navigate backwards to other system locations, so make sure the /path/to/your/data includes all the folders you need to access in your QuPath project.
Need Help? Contact Us!
If you have any questions or run into any issues, we’re here to help. Reach out to the Image Analysis team in CALM:
- Email: bioimage-analysis@crick.ac.uk
- Slack: #image-analysis
Happy analysing!